About jontas

I like to make things that people find useful.

Creating sitemap(s) in magento

A sitemap is a xml file that is used by (for instance) search engines to get a better overview of your site. It gives details about what pages exists and how ranks the pages towards themselves.
Despite the name the sitemap is not Google specific, it can be used for any search engine, or any other reason that you need a sitemap.

Create a folder for the site map and make it writable

First figure out where to place the sitemap(s) and make that location writable by the webserver.
In a Linux environment this is done from the console this is done like:

mkdir sitemap
sudo chown admin:www-data sitemap
sudo chmod 775 sitemap
touch sitemap/index.php

The touch index.php will create a empty index file (that keeps the folder from being listed.

Define a sitemap

In the admin panel go to “Catalog->Goolge Sitemap->Add sitemap”

Fill out this form with values that makes sense to you.
Note: If you have sveral stores one website, then all product that are visible on that website is added to the sitemap.

Make the site map update automatically

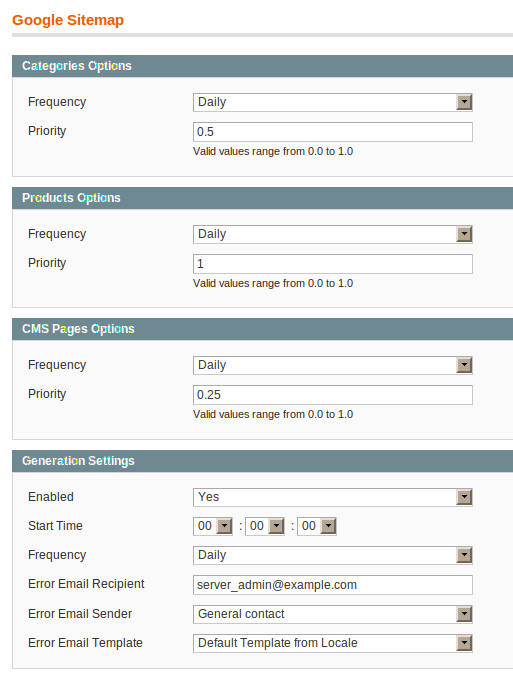
In the admin pangel go to “System->Configuration->Google sitemap”

As always, change to values that makes sense to you

Another (older) way of doing this is described by the guys at inchoo

Mediawiki turning on interwiki imports

If you wish to import data from another wiki running MediaWiki or for that matter from one or several wiki’s on wikipedia then there is a quick way to import page by page.

This functionality is in MediaWiki by default, but needs to be initiated. This is done by adding the following in LocalSettings.php

$wgImportSources = array(
      'wikinews',
      'wikiquote',
      'wikipedia',
);

The ImportSources are interwiki links from the database.

6 opto endstops for fermat

Endstops are used so that the machine using them to know where the ends of an area is. The opto endstop uses a Transmissive Opto Sensor and a flag that tells the machine that the limit is reached.

A opto endstop also needs a flag to break to break the optical sensor, but that is a later thing to do; also needs a bunch of cables for the installation…

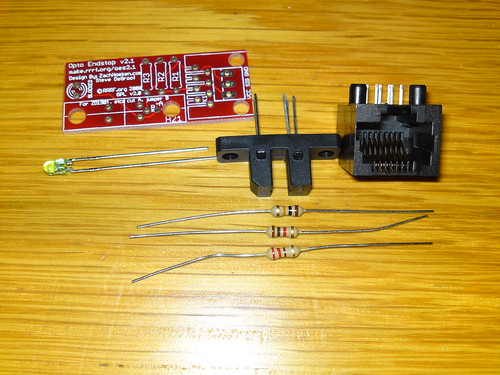
This is the components for one endstop laid out:
opto endstops kit

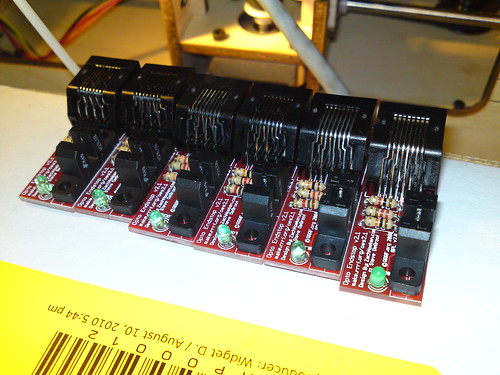
And the finished result:
6x opto endstops

sudo: cd: command not found

If you try to use sudo to get to a directory (for instance if the user calling sudo don’t have permissions for that folder) then you will see an error message like this

user@server:~$ sudo cd /var/log/
sudo: cd: command not found

While I don’t know how to get sudo to work with cd I can offer some workarounds.
As far as I can tell the problem with sudo cd is that if it would have worked the user would be in a directory that he/she has no permissions to so nothing is gained and having a folder that the user don’t have permissions to as the working directory might cause problems in more way than one.

  • Use “sudo ls” and then continue with the next command as sudo without entering that folder; for instance
      sudo ls /var/log
    sudo cat /var/log/syslog
  • Open a shell using sudo:
     sudo -s

    this will give you a shell with su permissions

  • simulate initial login using sudo:
     sudo -i

    this will also give you su permissions but with the difference that it will be like logging in like root (home dir, profile, variables etc) [this would be equivalent of running “sudo su”]

  • Use sudo to start a new shell and do all you need to do in this shell
     sudo sh -c 'cd /var/spool/exim4/;ls'

    (don’t miss the single quotes in the command)

To give some more details on the difference between -i and -s here is a excerpt from the man pages

-i [command]
The -i (simulate initial login) option runs the shell specified in the passwd(5) entry of the target user as a login shell. This means that login-specific resource files such as .profile or .login will be read by the shell. If a command is specified, it is passed to the shell for execution. Otherwise, an interactive shell is executed. sudo attempts to change to that user’s home directory before running the shell. It also initializes the environment, leaving DISPLAY and TERM unchanged, setting HOME, SHELL, USER, LOGNAME, and PATH, as well as the contents of /etc/environment on Linux and AIX systems. All other environment variables are removed.
-s [command]
The -s (shell) option runs the shell specified by the SHELL environment variable if it is set or the shell as specified in passwd(5). If a command is specified, it is passed to the shell for execution. Otherwise, an interactive shell is executed.

MD Replacing a drive in a degraded array

You get a email from the mdadm monotor telling you that one array is degraded (will look something like this)
DegradedArray event on /dev/md4:jontas02

This is an automatically generated mail message from mdadm
running on theserver
 
A DegradedArray event had been detected on md device /dev/md4.
 
Faithfully yours, etc.
 
P.S. The /proc/mdstat file currently contains the following:
 
Personalities : [raid1] [raid6] [raid5] [raid4] 
md4 : active raid1 sdb1[1]
      1465135936 blocks [2/1] [_U]

In this case I know from before – you make notes of how the md’s are located to drives, right 😉 – that md4 should be sda1 & sdb1
I also know from other logs that there is an error with sda1.

After physically replacing the drive the new disk needs to be added to this array in order to rebuild the array.

This is quick to do

admin@theserver:~$ sudo mdadm --add /dev/md4 /dev/sda
mdadm: added /dev/sda

And then a check of /proc/mdstat lets me know that it was added correctly and that the array is building

cat /proc/mdstat
Personalities : [raid1] [raid6] [raid5] [raid4]
md4 : active raid1 sda[2] sdb1[1]
      1465135936 blocks [2/1] [_U]
      [>....................]  recovery =  0.0% (473408/1465135936) finish=463.9min speed=52600K/sec

WordPress 3: Super Admin pulled a disappearing act

Had a slight problem after the database server had to make a unplanned reboot.
I have a Network running on the WordPress installation; the sites were working, the dashboard was working however I did not have the insert image icon in the posts and the Super Admin was not visible.

For me this turned out to be a simple. The database table “wp_sitemeta” was marked as crashed and could not be read by WordPress.

This is likely to be the problem if the Super Admin disappeared after a hard shutdown of the database server. (By hard I mean that the database didn’t have time to close tables, finish writing to tables etc)

Made a Makerbot extruder cable clip by justjoheinz

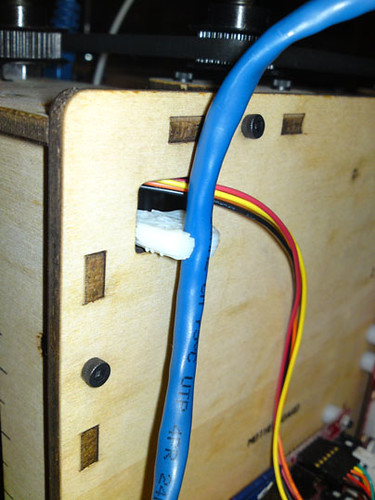
This is a small clip that fits in the hole above the motherboard and clips the cable that goes to the extruder – thus keeping it from touching the drive belt.

The model can be downloaded from Thingiverse to be printed.

The raft came lose at the end of the print so it was not completely finished, however it is still useful.

Makerbot extruder cable clip by justjoheinz (3989)

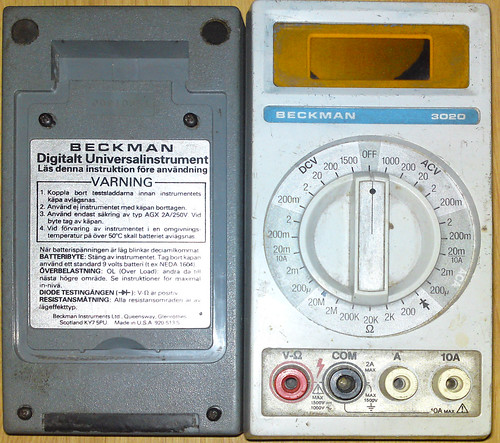
BECKMAN 3020 DMM – Cleaning and changing battery

I have gotten an old hand held DMM that had gotten some paint spilled on the LCD a long time ago.
Speaking of old

I have tried measuring resistance and voltage with it before but never gotten any good readings with it; the ohms was swinging between 0 and 50 when the test leads where shorted.

Today I figured I should try to clean it off as it is hard to read the LCD with paint over most of it.
I used some nail polish remover to get rid of the paint and when that was done I was able to see the decimal dot on the LCD.
Once I could see this I knew it was time to change the battery [On this DMM the decimal dot flashes when it is time to swap battery].
I am a bit surprised that the DMM even came to life, it should have a 9V battery. The old one had a best before date of 2001 and held all of 4.2 volts.

With a fresh and stronger battery the readings got a lot better, for instance with the test leads shorted now it reads about 0.2 ohms.

BECKMAN 3020

OpenVPN giving a client a static IP

To set up static IP for a client first set up client-config’s in server.conf

# EXAMPLE: Suppose the client
# having the certificate common name "Thelonious"
# also has a small subnet behind his connecting
# machine, such as 192.168.40.128/255.255.255.248.
# First, uncomment out these lines:
client-config-dir client-configs

Then create the directory “/etc/openvpn/client-configs
Then create a file with the name of the client that is connecting in this folder
(for instance “/etc/openvpn/client-configs/backup”)

#Give this machine 10.8.0.3 a a static ip
ifconfig-push 10.8.0.3 10.8.0.0

(Remember to replace with values that makes sense to you)

OpenVPN: TLS Error: reading acknowledgement record from packet

This error message (in my experince) most often means that one side (either the client or the server) is set up for TLS auth, but the other side is not.

Check both configs and fix this problem.

To add it to a client
Copy the file /etc/openvpn/ta.key from the server to the client
and then edit /etc/openvpn/myVpn.conf

# If a tls-auth key is used on the server
# then every client must also have the key.
tls-auth ta.key 1